Thursday, July 25, 2013

'Nother Throwback: Pumpkin Pie Revisited

Here's another three year-old post:

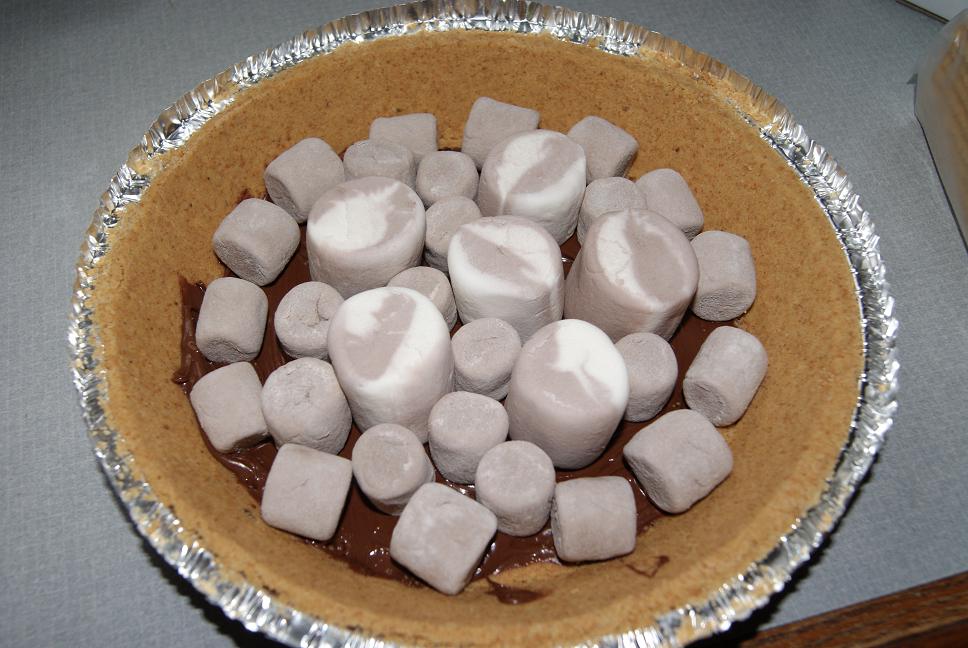
The chai pumpkin pie (from the last entry) was.... okay. I'm told I'm being too hard on myself about it, which is not unlike me. The guys said it was good and cleaned their plates to further indicate this, but after having tasted the first pie I made (which was an easy ready-made mix), I found pie #2 to be bland in comparison. After consulting with one of my home fries, I decided to add ginger and cloves to Chai Pumpkin Pie #3, which I made last night.


I still had excess pie mix (I ended up throwing out the excess from last Thursday because I could not find tiny pie shells, and my mom had said that the mix only lasts a couple of days), so I've saved the excess from last night and am taking it home for the mah-in-law to see what ideas and means she has. I made sure not to try to make the super pie, so no mess. I also took the pie out of the oven about 8-10 minutes sooner (I used the kitchen timer on the microwave and stopped it briefly to microwave chocolate chips for a cheesecake I was making and then forgot to set the timer back right away, so the time is an approximation).


So the pie looked quite nice after taking it out of the oven, versus the awful burnt-cheese-toast look that pie #2 had (see previous entry).

Throwback: Pumpkin Pie Failure / Success in Finding What Doesn't Work

Hey! So I'm back! Kinda. My mom said I should make more of these, and I'm cheating by posting an old recipe. This is a post I made in another journal about three years ago, in which I explain to the readers (well, realistically, I think I had one reader, but let's pretend I'm more popular than I am) that the pumpkin pie I had been looking so forward to making... did not live up to expectations. But it ended up tasting a'ight.

The pie did not go as planned.

I bought a can of Libby's Pumpkin Pie Filling and followed the directions (aside from using ginger and cloves).
I had a 9 inch pan.
1 12 ounce can of Carnation Evaporated Milk (in the same section as the pie filling-- for your holiday baking convenience)
Approximately 1/2 teaspoon of salt
3/4 cup of Splenda (I prefer it over sugar)
Approximately 1 teaspoon of cinnamon
Approximately 1 teaspoon of pumpkin pie spice (in lieu of the ginger and cloves)
2 large eggs
And 6 scoops of chai mix bought from the local coffeeshop (because the mix called for one scoop per 2 oz. of hot water or milk-- 12 oz. of evaporated milk would make 6 scoops)

So I nuked the evaporated milk into a bowl for 90 seconds and poured it into the mixing bowl (I didn't trust the mixing bowl in the microwave). I whisked the chai mix in with the heated evaporated milk (it wouldn't mix well if not heated after all). I added the Splenda, salt, cinnamon, and pumpkin pie spice in the increments as noted and whisked vigorously. I then added two large eggs and whisked those, ensuring the yolks were all kinds of mushed. I opened the can of pumpkin pie filling and scooped it out with a large spoon and thoroughly stirred the contents of the mixing bowl.

I began pouring the mix into the pie crust. And then I noticed that I still had plenty left over. I have no idea why. It was almost enough for another pie (a puny one, but still). I tried to add a bit more to the pie, thinking that it would just be a SUPER PIE!

I realized the flaw in my plan as I made the seemingly long walk to the oven. The filling began to seep over the sides, and I rushed as slowly as possible (yeah, I know what I said) to a nearby counter, leaving behind a trail of pumpkin pie filling on the kitchen floor... I should have taken a picture of it, just for the silly factor. I cleaned the floor and scooped excess filling from the pie back into the mixing bowl (filling from the pie, not filling from the floor. I have some class.). This time, I had no trouble walking to the oven, but I did singe a knuckle getting the pie inside. I consider it a tiny pink badge of courage though.

425 degrees for 15 minutes. 350 degrees for 50 minutes.

I called my mom to find out what to do with the excess filling. I have no need for another pie at this time. I'm making pies on Tuesday for Thanksgiving (because Wednesday is work and journeying seven hours to see family). I have saved it and may make a tiny pie.

I checked up on the pie by peering through the glass and saw that it appeared to be sinking in the middle. D'oh. I thought, "Well, I can always add whipped cream and cinnamon on top in the center and even that out." Then near the end of it baking, it inverted. Rather than sinking, it was puffing upward. I didn't know what to do about that. The timer went off shortly thereafter, and I took out the pie to see that it looked... burnty.


The burnt-looking areas appear to be where the excess filling was. It reminds me of cheese toast. You know? That upper layer that gets burnt, but then you peel that off, and everything underneath it remains awesome? I'm hoping that's what happened here because this top layer feels kind of like that... Eesh.

I'm disappointed in the appearance obviously. I haven't tried the pie yet. I set it out for two hours and put it in the fridge overnight. We're going out of town this weekend to see friends and watch Shakespearean plays. I made the pie for the fellas because I wanted to show how awesome my pie-baking skills are (after having successfully made a chai pumpkin pie last week). I've talked up this pie for the past week and a change, so naturally, I wanted it to be flawless.

But then, my life is a comedy of errors, so it's to be expected, and it's why people love me. In that respect, the pie turned out exactly as it should have.

Sunday, August 7, 2011

Semi-Healthy Broccoli and Mushroom Quiche!


As mentioned a few moments ago, I made a quiche earlier this summer, and it was rather tasty. I decided I'd try to make another one to share with my dad's side of the family at our reunion this afternoon.

Ingredients! Only forget the mozzarella cheese in the background. I ended up not using it. And pretend that the 9-inch pie crust is in the picture. In reality, it was thawing on the other side of the kitchen so that it'd separate from the other pie crust to which it was attached (two-pack, yo).

Preheat the oven to 350 degrees.

My recipe before called for diced onion, but I decided to go with broccoli this time. As for measurements, I can't say. Somewhere between a half a cup and a cup. The recipe calls for half a cup of onion, but I figured more broccoli couldn't hurt, so I diced until there was no more tree branchy bits and called it a day.


In one bowl, mix your cheeses and flour. That's two cups of shredded cheese and one cup of Monterey Jack (and other assorted) cheese. Three tablespoons of flour.

In a separate bowl, add five eggs (or in this case, Liquid Egg / Egg Beaters equivalent), 1/2 cup of half and half, broccoli, and a 4 oz. can of drained sliced mushrooms. Mix it up. Then add the bowl of your cheeses and flour.


And it'll look kinda like this. Mix a bit more.


Pour contents into pie crust. Like so.
Only you probably won't have a camera in one of your hands.


Bake at 350 degrees. I set the timer for 45 minutes, checked it out, and added another 12 minutes. You should allow for a total of 60-70 minutes in the oven, but some ovens are quirky.


It should come out looking something like this.

Cool for 10 minutes before serving.

I'm wrapping this up for our two-ish hour drive to the reunion.

S'mores Pie Revisited


Last year, I made my very first s'mores pie, which I was inspired to create after dining with my husband at Mountain State Brewing Company in McHenry, MD. They have a lovely s'mores dessert with Nutella and marshmallows over flatbread. I thought, "I should try something similar." So I got graham cracker pie crust, marshmallows, graham crackers, Nutella, and whipped cream. It was wonderful! I hadn't made it since last summer though.


This weekend is my first family reunion on my father's side of the family, and it's a potluck. I had decided early on that I'd make a quiche, since my first go with that earlier this summer was a success (I can post about the quiche later). I also wanted to bring a dessert. Why not try to make the s'mores pie again?


So here are the ingredients! Only pretend that you don't see the whipped cream. I used whipped cream last summer and decided at the last minute that I didn't want to use it this time.

I immediately began preheating the oven to 375 degrees. I just arbitrarily decided that was a good baking temperature for this, since graham cracker crust is precooked, and I don't want to burn it. (Last year, I tried baking a pie with graham cracker crust for as long as it was suggested because I didn't realize this piece of apparently common knowledge...)


I spread a layer of Nutella along the bottom of the pie crust. You can opt to spread the Nutella on the sides as well if you'd like. I didn't do it, but maybe I will next time.


I used two different kinds of Jet-Puffed marshmallows. One was a mocha kind, which I used like so.


It was silly of me, but I didn't realize that the two-in-one chocolate and vanilla marshmallows that I'd purchased were significantly larger than the mocha marshmallows. I didn't want to move the mocha ones though and mess up the Nutella, although I suppose that wouldn't have been a horrible thing.


I was then going to apply a layer of graham crackers on top, but I thought, "Maybe I don't have enough marshmallows..."

So I added more marshmallows....

Last time, I had trouble spreading the Nutella on top of the layer of graham crackers, so this time, I thought, "Spread the Nutella first."

And then I put the crackers face down. I figure that taste buds won't know the difference if my layering is slightly inconsistent.

I then completed the graham layer, like so. It's obviously not going to be perfect with shapes not matching up and all, but again, will your taste buds know the difference? Nope.


I added more mocha-y marshmallows (because those larger ones seemed like a bad idea in my mind-- in the future, I'll put more larger ones on the bottom layer).

I was debating between an extra layer of graham crackers and crushing them. I went with breaking them up a bit.

Like so.


Remember: bake at 375 degrees. Or not. I guess you could do 400. Or 350. Your choice. I picked 375 and baked for five minutes.


And this is what the pie should look like after five minutes in the oven (well, I had it in there for three, took it out, had AJ look at it, and he said it could stand a couple of more minutes, so I put it in there for another two.). Note: your marshmallows will not be purple unless they were purple when they went in. Do not fear the marshmallows!

So I'd decided at the last minute not to use whipped cream and went straight to drizzling the pie with chocolate syrup. Then I put the pie in the fridge. I haven't tried it yet, as the reunion isn't until 1:00 this afternoon, but I imagine it shall be awesome.

Monday, July 18, 2011

Peanut Butter & Nutella Cheesecake

I tweaked a Nutella cheesecake recipe that I used over the summer.

The recipe called for:


16 oz cream cheese (softened) -------- I used 8 oz of cream cheese and tried to estimate the difference with whipped cream, as per the hubby's request after making the Nutella cheesecake over the summer
1/2 cup granulated sugar -------- I used Splenda
1 (13 oz) jar of Nutella -------- I had approximately half a jar left, and so I used the remains there and made up the difference in JIF peanut butter (which was going to be the plan even if I had a whole jar of Nutella-- just use half)
1/4 teaspoon vanilla extract
1 (9-inch) prepared graham cracker crust -------- I used Oreo crust

So I mixed the 8 oz of cream cheese with the whipped cream (I used a spray of it rather than a plastic container-- I don't know how to approximate flying whipped cream, but let's say I went with six teaspoons) and the 1/2 cup of granulated Splenda. I then scooped out the half a jar of Nutella. Then I realized I'd used the only clean tablespoon for this job, and it was covered in Nutella. So I used a teaspoon for the peanut butter, and I think I got my math right. I went under the assumption that three teaspoons equals one tablespoon. And two tablespoons is one serving. And four servings was about what I needed. I think. Who knows? That's what I did though. So I had 12 teaspoons of JIF in the mix.


And that was a workout. I wonder if Julia Child could benchpress a bus. Anyway. I stirred for what felt like forever (sure, put that in your directions), and then I nuked two servings worth of Ghirardelli chocolate chips (a serving, according to the bag, is 32 chips. 32 chips is not a lot when you pour it in a cereal bowl and think, "This is supposed to be in a cheesecake." So I opted to double it.) for about a minute and poured that into the mix.


I stirred for another eternity. I wasn't pleased with the consistency, so I added more whipped cream (let's say 4-6 teaspoons) and stirred some more. Still wasn't happy with the cut of its jib, but I stirred as the recipe indicated, which was until no streaks remained. It was all one happy color of some kind of brown.


I poured it in the Oreo pie shell and tried to improve the appearance with more whipped cream. But I'm bad at that, so it still looked funny:


But it was wonderful.